Authentication and Users
This page provides an overview of how to authenticate with the TANGO platform and manage users within a workspace. The management of users is dedicated to the workspace supervisors, who can invite new users, edit existing users, and manage their access to the workspace.
Authenticate with TANGO
The standard authentication and registration procedure is described in TANGO Authentication.
After successfully authenticating with TANGO, you may need to use the TANGO API to manage the list of users in your workspace.
More details on these operations are provided in the sections below.
In this page it shown how to manage users in TANGO through the TANGO Dashboard, as it provides a user-friendly interface for managing users. However, all these operations can also be performed through the TANGO API if you may need it.
Manage Users
After logging in to the TANGO Dashboard as a workspace supervisor, you can manage the users of your workspace.
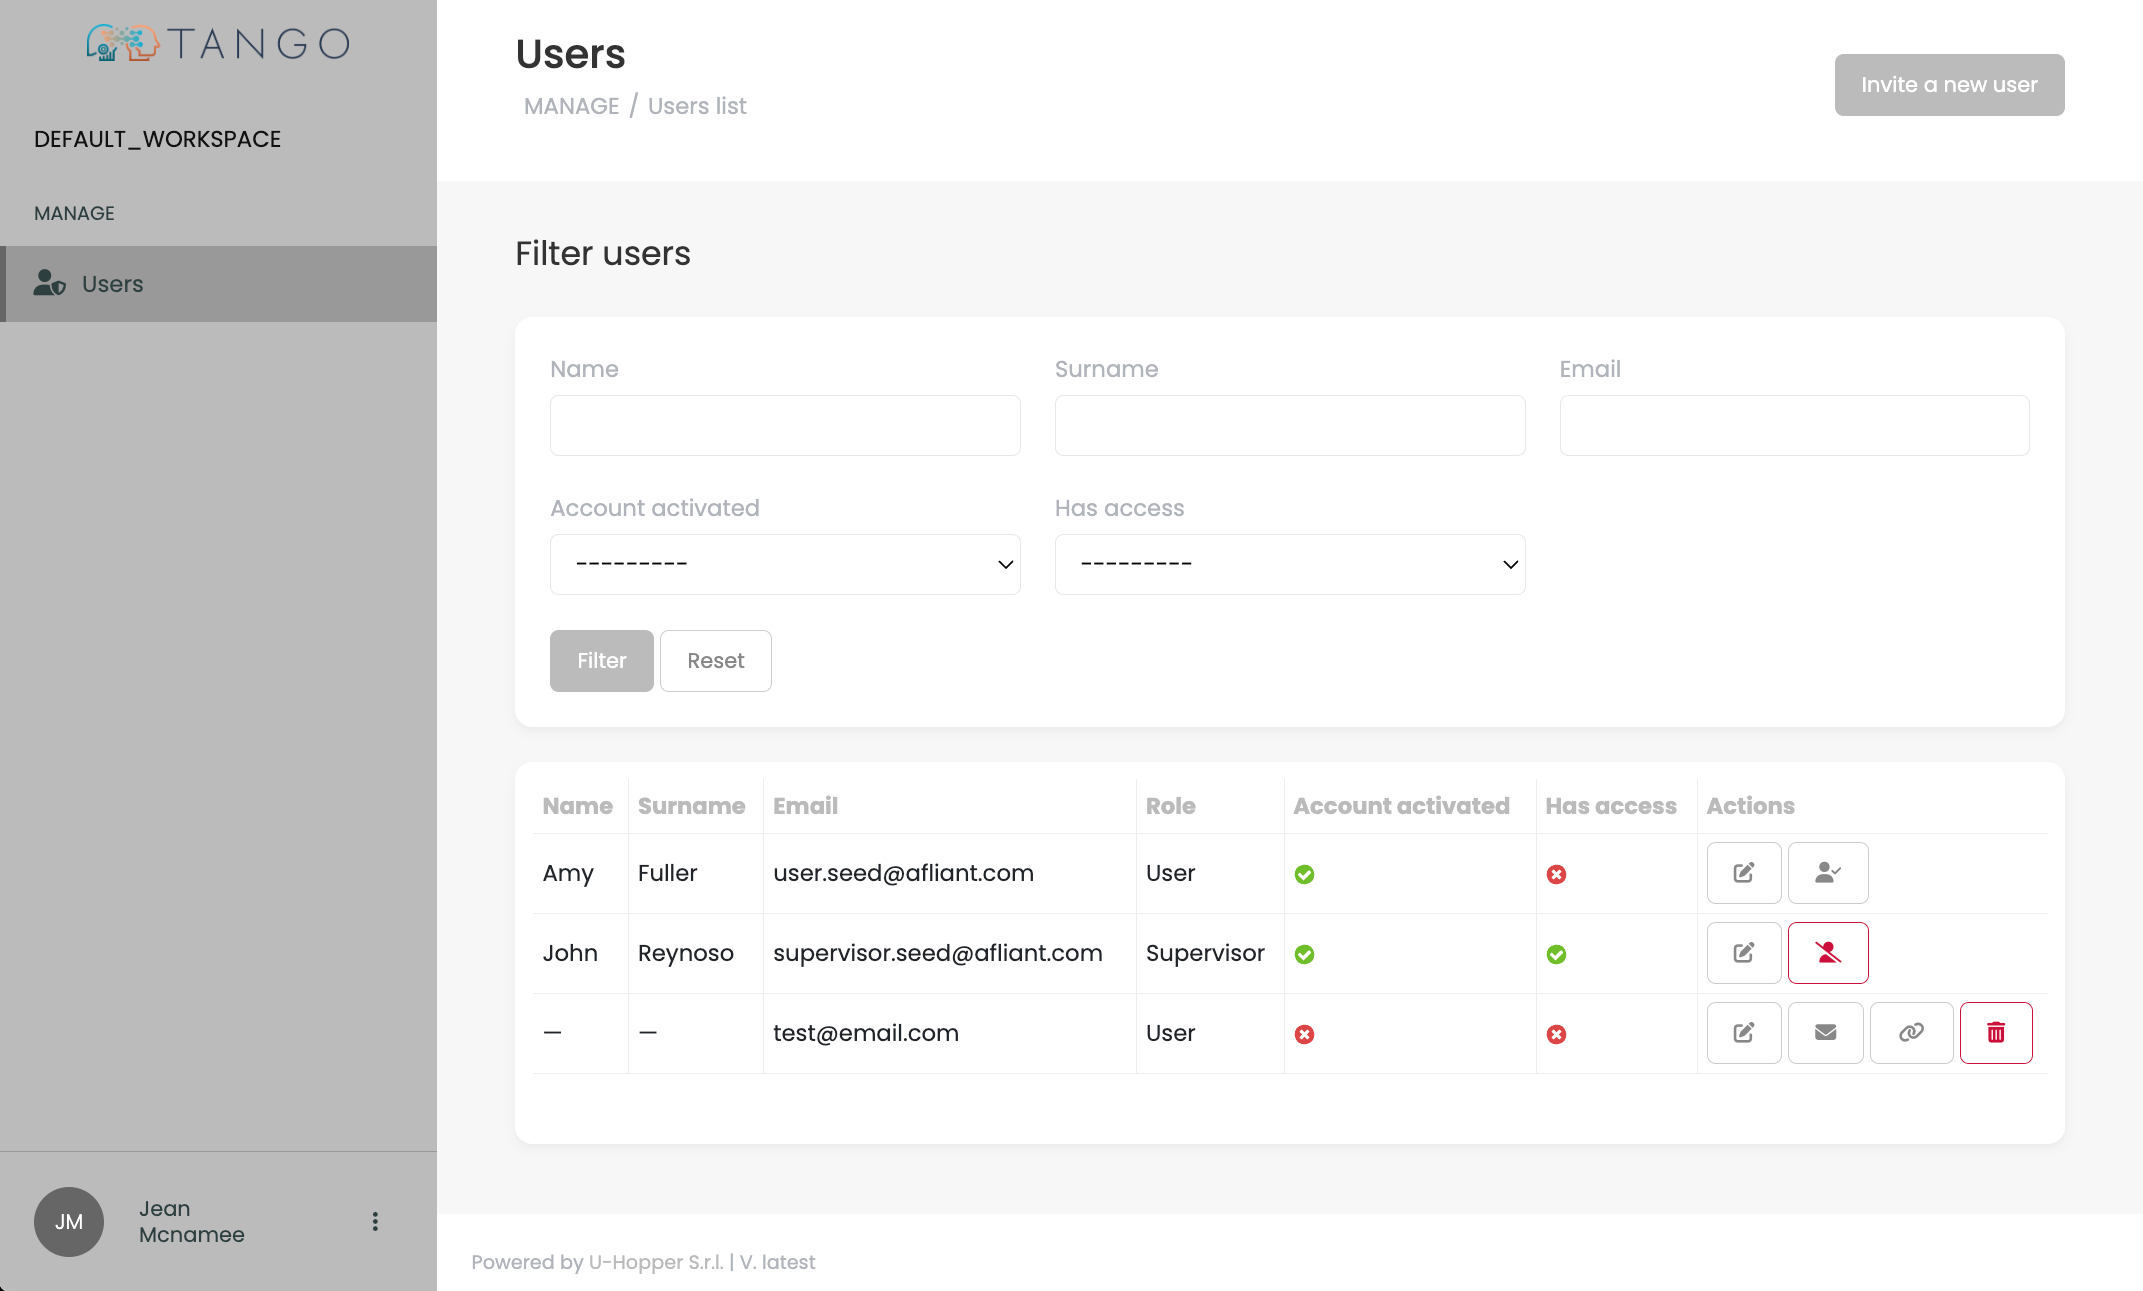
This is the page you should see:
Invite a new User
To invite a new user to your workspace, click on the appropriate button in the top right corner of the page.
You will be prompted to enter the email address of the user you want to invite, as well as the role you want to assign to them (USER or SUPERVISOR) and the language to use for the invitation email.
A SUPERVISOR user will be able to manage users in the workspace in the same way you can do, while a USER will only be able to use the models in the workspace.
An invited user can register to the TANGO Platform by following the instructions in the invitation email. More details on this process are provided in the Registration page.
Operate on a User
In the list of users, you can perform the following operations on each user:
- Edit: Click on the pencil icon to edit the user language.
- Enable/Disable: Click on the user icon to enable or disable the user in the workspace. A disabled user will not be able to access the workspace, but will still be part of it in case you want to re-enable them later.
In addition, if a user has yet to accept the invitation to the workspace, you can also:
- Resend Invitation: Click on the envelope icon to resend the invitation email to the user.
- Copy Invitation Link: Click on the link icon to copy the invitation link to the clipboard. You can then share this link with the user to allow them to register to the workspace.
- Delete: Click on the trash can icon to delete the user from the workspace. This will remove the user from the workspace.